本文最后更新于 2025年4月27日 晚上
前言
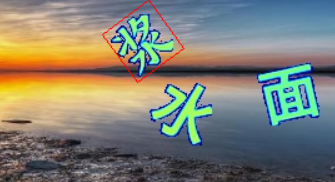
目标检测模型一般都是用无角度的矩形框标注的,但有些时候我们的目标在图像中是有角度的,我们希望框出来的目标矩形框也是有角度的贴合目标的,比如下面这种情况
(虽然训练结果不好,可能是数据集数量少,或者对这种类型的数据集效果不理想之类的,但还是记录一下过程)
yolov5本身是一个轻量级的目标检测模型。不支持旋转目标矩形框。
此次用到的是牛人改写的yolov5-obb
hukaixuan19970627/yolov5_obb: yolov5 + csl_label.(Oriented Object Detection)(Rotation Detection)(Rotated BBox)基于yolov5的旋转目标检测 (github.com)

项目环境准备
git clone https://github.com/hukaixuan19970627/yolov5_obb.git
cd yolov5_obb
pip install -r requirements.txt
cd utils/nms_rotated
python setup.py develop #or “pip install -v -e .”
其中最后一步可能会出错,属于CUDA环境问题,如果torch.cuda.is_available()==True的话,那应该是cuda toolkit的问题,CUDA_HOME环境变量之类的问题
数据集格式
看一下dataset/datasetdemo下的示例
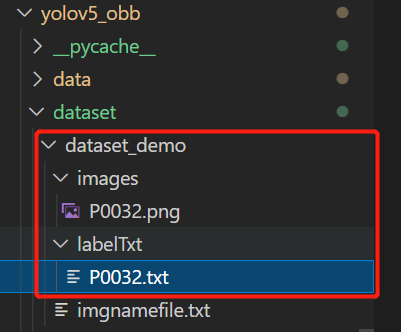
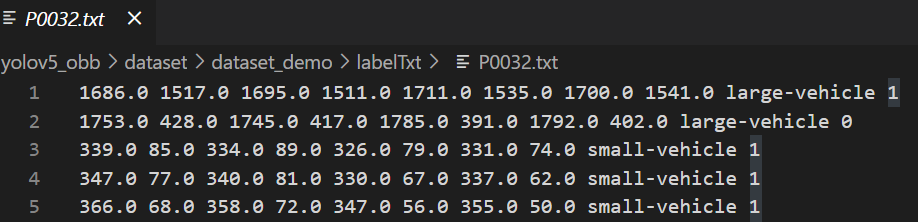
结合介绍看一下
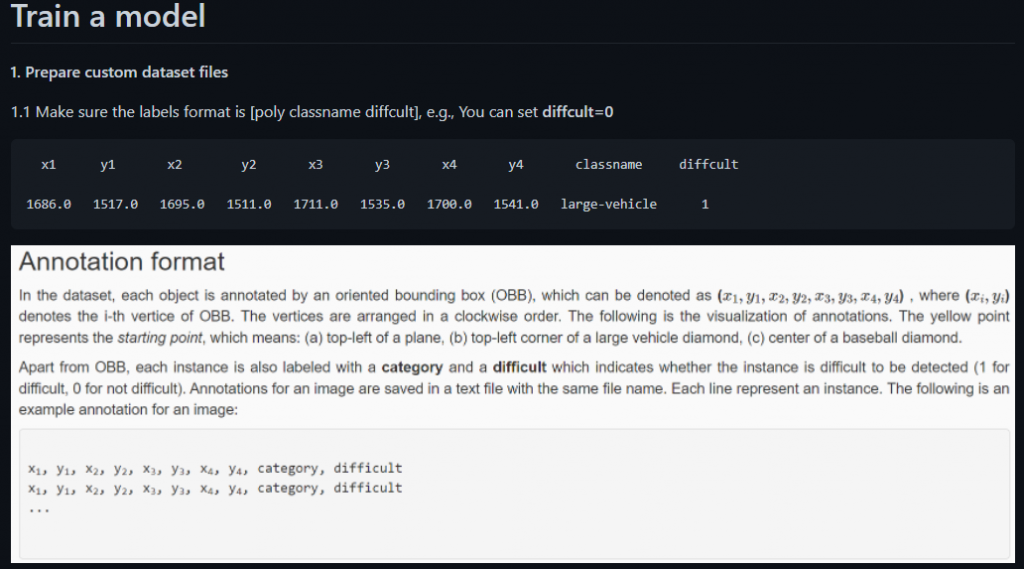
可以看出,图片标签的格式是倾斜矩形框的四个点,类别名,是否difficult
用rolabelimg给图片打标签
旋转目标检测数据集制作-rolabelimg的安装和使用 – Xinhao Jin
标注完之后得到的是xml格式的标注文件
需要转换为上述格式的txt文件(4个点1个类别1个difficult)
找了一下好像项目中没有用于数据集转换的代码,可能作者觉得这很简单。。。
转换数据集格式
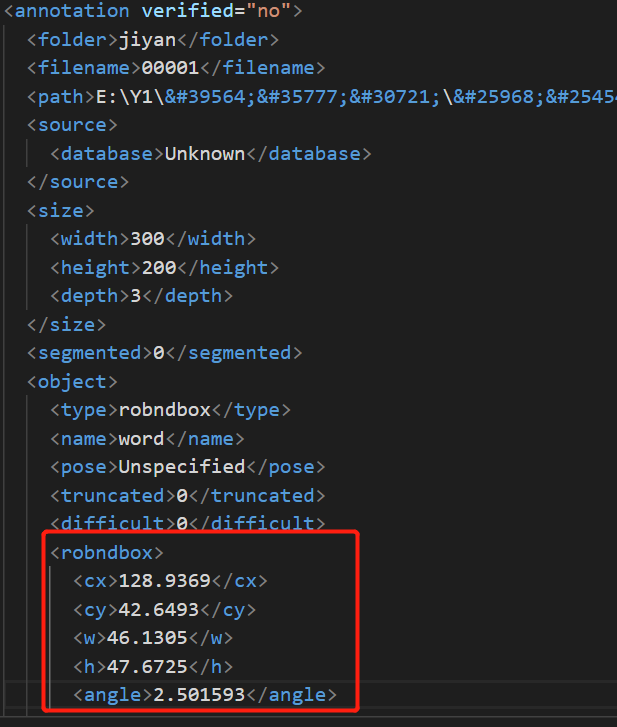
想想应该也不是很难,自己动手,丰衣足食,首先把xml中的robndbox标签内容读出来,这时候才发现,怎么不是四个点的坐标?
而是中心点坐标,髋,高,旋转角度??
坐标转换函数如下
1
2
3
4
5
6
7
8
9
10
11
12
13
14
15
16
17
18
19
20
21
22
23
| def rotate(cx, cy, w, h, angle):
angle=-angle
points = [[cx-w/2, cy-h/2], [cx+w/2, cy-h/2],
[cx+w/2, cy+h/2], [cx-w/2, cy+h/2]]
newpoints = []
if angle < 0:
angle = -angle
for point in points:
x, y = point
newx = round((x-cx)*math.cos(angle) - (y-cy)*math.sin(angle) + cx,1)
newy = round((x-cx)*math.sin(angle) + (y-cy)*math.cos(angle) + cy,1)
newpoints.append([newx, newy])
else:
for point in points:
x, y = point
newx = round((x-cx)*math.cos(angle) + (y-cy)*math.sin(angle) + cx,1)
newy = round((y-cy)*math.cos(angle) - (x-cx)*math.sin(angle) + cy,1)
newpoints.append([newx, newy])
return newpoints
|
从xml到目标txt,完整代码如下:
首先把xml放在一个单独的文件夹里,然后执行程序会在xml同级目录生成txt文件夹
1
2
3
4
5
6
7
8
9
10
11
12
13
14
15
16
17
18
19
20
21
22
23
24
25
26
27
28
29
30
31
32
33
34
35
36
37
38
39
40
41
42
43
44
45
46
47
48
49
50
51
52
53
54
55
56
57
58
59
60
61
62
63
64
65
66
| import os
import math
import xml.etree.ElementTree as ET
import numpy as np
import cv2
def rotate(cx, cy, w, h, angle):
angle=-angle
points = [[cx-w/2, cy-h/2], [cx+w/2, cy-h/2],
[cx+w/2, cy+h/2], [cx-w/2, cy+h/2]]
newpoints = []
if angle < 0:
angle = -angle
for point in points:
x, y = point
newx = round((x-cx)*math.cos(angle) - (y-cy)*math.sin(angle) + cx,1)
newy = round((x-cx)*math.sin(angle) + (y-cy)*math.cos(angle) + cy,1)
newpoints.append([newx, newy])
else:
for point in points:
x, y = point
newx = round((x-cx)*math.cos(angle) + (y-cy)*math.sin(angle) + cx,1)
newy = round((y-cy)*math.cos(angle) - (x-cx)*math.sin(angle) + cy,1)
newpoints.append([newx, newy])
return newpoints
def roxml2txt(dir):
files = os.listdir(dir)
parentdir,dirname = os.path.split(dir)
txtdir=os.path.join(parentdir,'txt')
if not os.path.exists(txtdir):
os.mkdir(txtdir)
for f in files:
xml = ET.parse(os.path.join(dir,f))
root = xml.getroot()
boxes = root.iter('robndbox')
with open(os.path.join(txtdir,f.split('.')[0]+'.txt'),'w+') as t:
for box in boxes:
cx = float(box.find('cx').text)
cy = float(box.find('cy').text)
w = float(box.find('w').text)
h = float(box.find('h').text)
angle = float(box.find('angle').text)
newpoints = rotate(cx, cy, w, h, angle)
newpoints=np.array(newpoints)
newpoints= newpoints.astype(int)
img=cv2.imread(os.path.join('test','images',f.split('.')[0]+'.png'))
img=cv2.polylines(img,[newpoints],isClosed=True,color=(0,0,255))
cv2.imshow('pic',img)
cv2.waitKey()
line=''
for point in newpoints:
line+=str(point[0])+' '+str(point[1])+' '
line+='word 0\n'
t.write(line)
print(line)
t.close()
roxml2txt('test/xml')
|
为了检验坐标转换是否正确,加入了一段画图代码
1
2
3
4
5
6
| newpoints=np.array(newpoints)
newpoints= newpoints.astype(int)
img=cv2.imread(os.path.join('test','images',f.split('.')[0]+'.png'))
img=cv2.polylines(img,[newpoints],isClosed=True,color=(0,0,255))
cv2.imshow('pic',img)
cv2.waitKey()
|
效果如下,说明是正确的
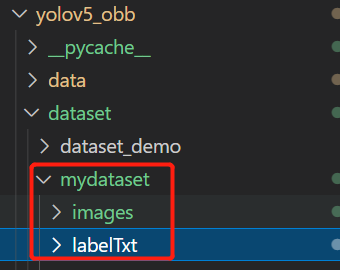
数据集放进项目目录
然后把图片文件夹改名为images,把txt文件夹改名为labelTxt(不改也行,这样显得规范)
在dataset目录下新建一个文件夹,存放images和labelTxt
训练
首先要下载预训练模型,应该在github上的yolov5项目里,下载yolov5s.pt即可
ultralytics/yolov5: YOLOv5 🚀 in PyTorch > ONNX > CoreML > TFLite (github.com)
如果是linux,直接使用作者提供的脚本
pwd=yolov5_obb/ 执行

bash data/scripts/download_weights.sh
会自动下载权重文件到yolov5_obb/,为了好看一点还是新建一个weights文件夹来存放
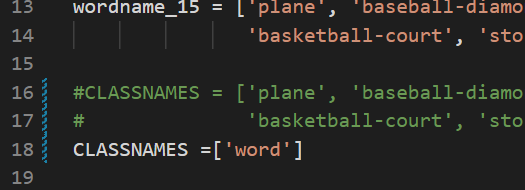
修改yolov5_obb/DOTA_devkit/dota_utils.py
classnames改为自己的类别
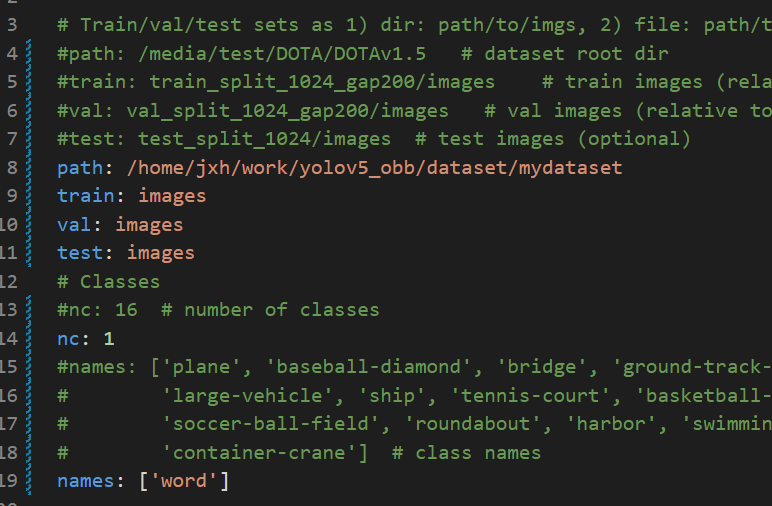
修改yolov5_obb/data/dotav15_poly.yaml
修改数据集的目录
train,val,test都是与path间的相对路径,我这里图方便设为同一个了
然后修改nc类别数和names类别名即可
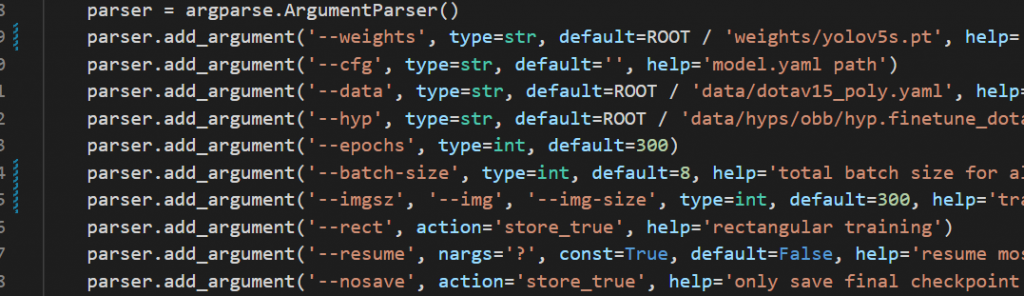
修改yolov5_obb/train.py
修改参数
weights:/weights/yolov5s.pt,下载的预训练模型路径
data:/data/dotav15_poly.yaml,刚刚修改的配置文件路径
epochs:100,训练次数
batch-size:8,一批的数量
imgsz:300,图片大小
device:0,显卡索引,没有的话写cpu
workers:8,线程数,出错的话就不断减小
执行python train.py即可训练
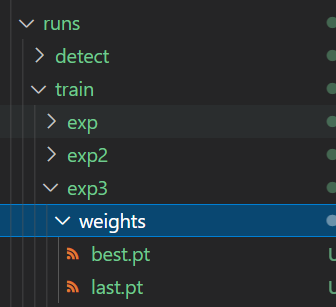
结果保存在runs/train/exp…/
预测
修改yolov5_obb/detect.py
weights路径改为上面训练完生成的权重文件
source是用于预测的图片路径
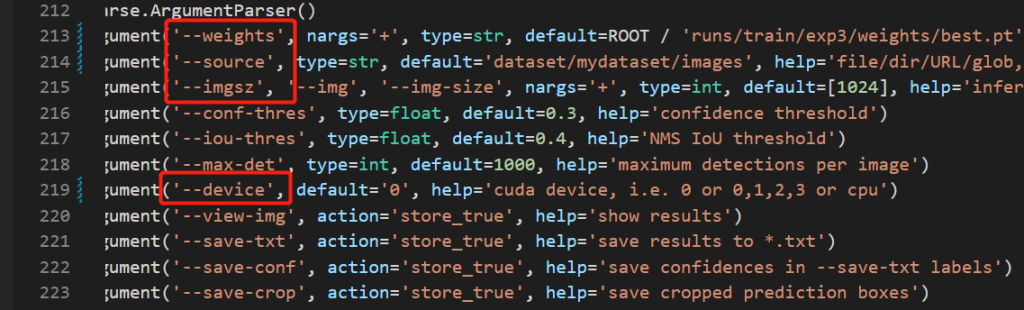
预测结果保存在runs/detect/exp../下
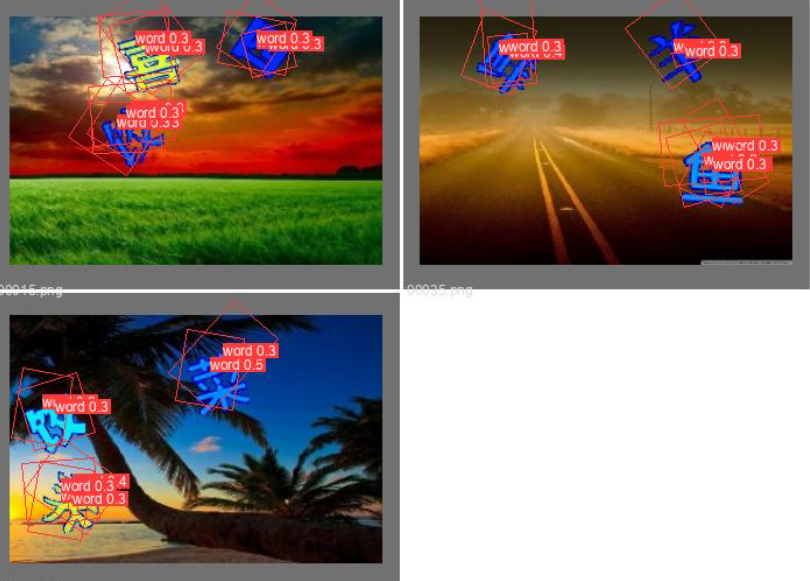
这是35张图片300次训练的结果,可以扩大数据集并且把训练集验证集分离,应该会有好的效果