本文最后更新于 2025年4月27日 晚上
之前一直使用VS2019调试c++程序,但是平时写得比较多的单个cpp文件也需要建一个VS项目给人的感觉有些冗杂,接触了VSCode之后就被它的轻量和高扩展性吸引了,是时候把断点调试功能也配置好,尽量不用VS2019了。
在这之前需要安装好MinGW,配置好环境变量。
然后安装这个插件 CodeLLDB

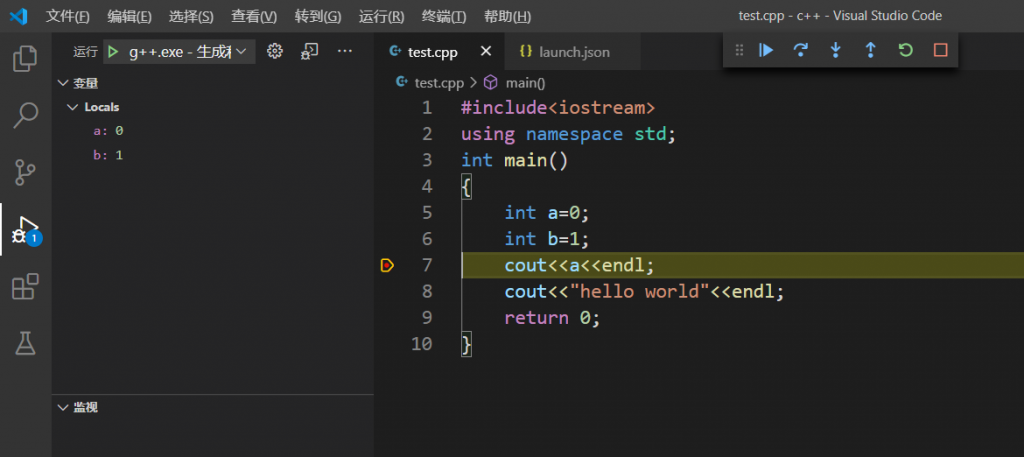
打开空文件夹,新建cpp文件,可以先设置好断点

点击创建launch.json文件,选择C++(GDB/LLDB)

选择配置 g++即可

直接进入断点调试

在.vscode文件夹中自动生成了launch.json和task.json
launch.json:
1.建议把”externalConsole”:设置为true,这样控制台运行窗口就是独立的
2.”miDebuggerPath”需要根据MinGW的安装路径确定,不过我这里自动生成的就是正确的,可能是因为提前设置好了环境变量吧
1
2
3
4
5
6
7
8
9
10
11
12
13
14
15
16
17
18
19
20
21
22
23
24
25
26
27
28
29
| {
"version": "0.2.0",
"configurations": [
{
"name": "g++.exe - 生成和调试活动文件",
"type": "cppdbg",
"request": "launch",
"program": "${fileDirname}${fileBasenameNoExtension}.exe",
"args": [],
"stopAtEntry": false,
"cwd": "${workspaceFolder}",
"environment": [],
"externalConsole": true,
"MIMode": "gdb",
"miDebuggerPath": "C:MinGWbingdb.exe",
"setupCommands": [
{
"description": "为 gdb 启用整齐打印",
"text": "-enable-pretty-printing",
"ignoreFailures": true
}
],
"preLaunchTask": "C/C++: g++.exe build active file"
}
]
}
|
tasks.json:
同样的,唯一要修改的可能就是”command”部分的g++路径,与MinGW路径对应
1
2
3
4
5
6
7
8
9
10
11
12
13
14
15
16
17
18
19
20
21
22
23
24
25
26
| {
"tasks": [
{
"type": "shell",
"label": "C/C++: g++.exe build active file",
"command": "C:MinGWbing++.exe",
"args": [
"-g",
"${file}",
"-o",
"${fileDirname}${fileBasenameNoExtension}.exe"
],
"options": {
"cwd": "${workspaceFolder}"
},
"problemMatcher": [
"$gcc"
],
"group": {
"kind": "build",
"isDefault": true
}
}
],
"version": "2.0.0"
}
|


